It’s so much more than a place to take notes during class.
In the last few years, interactive notebooks (INBs) have become incredibly popular in all sorts of classrooms. If you’re new to the concept, or just unsure of where to start, here’s what you need to bring this learning tool to your students. And be sure to check out all the awesome interactive notebook examples we found to give you some inspiration.
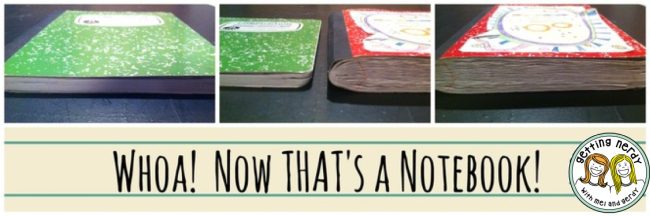
Think of it as an all-in-one resource for students on any given subject. Rather than just using the notebook to take notes during class, kids add to them with hands-on activities, drawings, reference pages, and so much more. It combines the best of worksheets, reference materials, and handwritten notes all in one place. By the end, an interactive notebook is so full that it often winds up being twice the size. Students have something meaningful to review before a test or look back on to reflect on their learning.
Interactive notebooks involve “teacher input” items, such as blank templates, images to color or copy, and sorting activities to cut and paste. It’s important that each teacher input item also involves student output: something to complete, color, fill in, illustrate, etc. That’s what makes the notebook interactive.
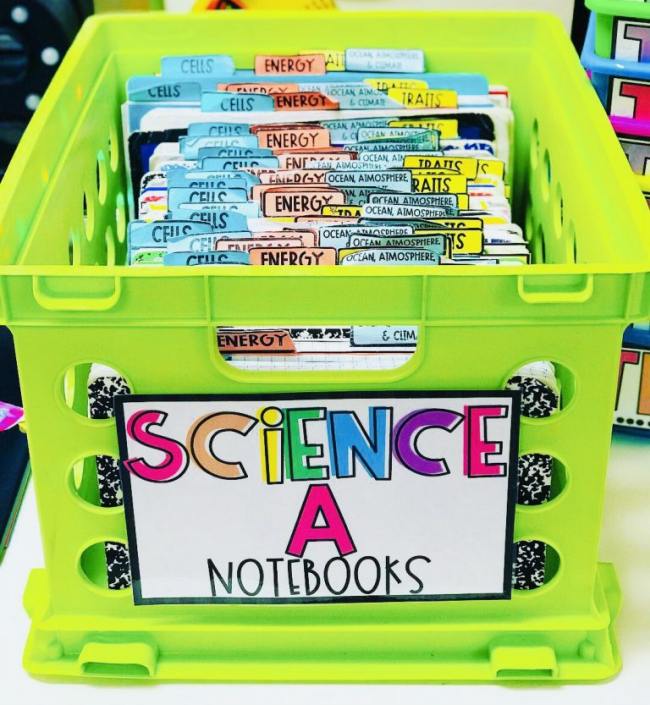
First, decide what type of notebook your students should use. Many teachers recommend composition-style over spiral-bound, since those wire spirals tend to get pretty bent out of shape as the year goes on. Plus, composition notebooks are easy to store in a bin without the wires getting tangled up. In primary grades, plan for multiple notebooks, one per subject.
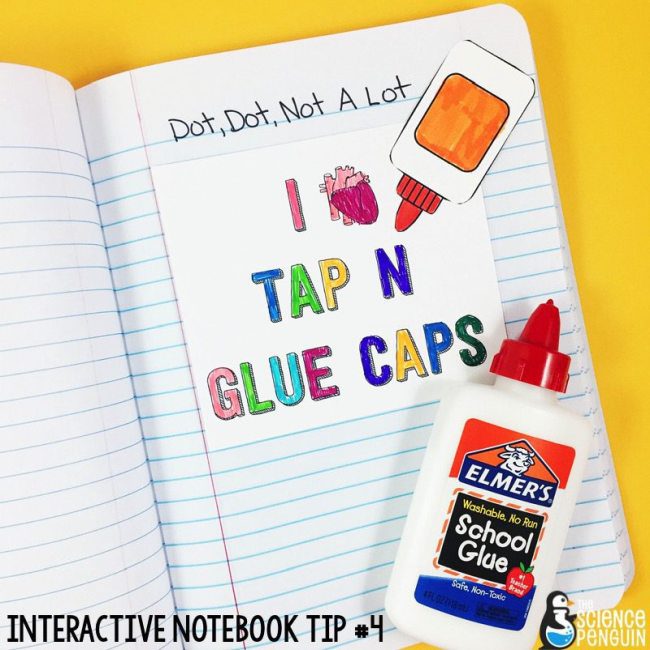
Then, stock up on glue! Kids will be adding additional elements to many of the pages, and you need a way to fasten them in that dries quickly and is easy to use. For younger kids, offer hands-on help at the beginning so they can learn to apply the glue only where needed (you don’t want those pages getting stuck together!). Many teachers prefer glue sticks, but Tap ‘N Glue caps or a glue sponge can work well too.
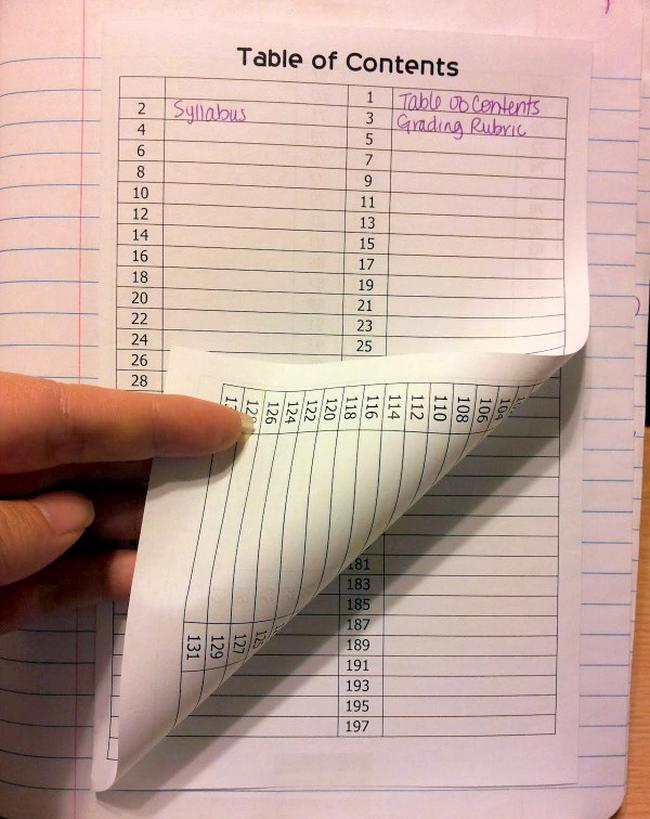
No matter what your notebook ultimately contains, be sure to include an easy way to navigate it. Some teachers like a table of contents at the beginning, with the ability for students to fill in new sections as they go. (Pro tip: Don’t try to keep everyone on the same page—it’s just too easy for a student to make a mistake. Instead, let kids number their own pages and fill in their own TOCs.)
ADVERTISEMENT
Other teachers prefer to use a tab system instead, so they don’t need to worry about page numbers at all. This works well for notebooks that aren’t overly long or complicated. You can also combine a TOC with tabs, to make things even easier for students.
If you’re feeling overwhelmed at the thought of getting started with this tool, don’t worry! So many other teachers use and love them, and they’re happy to share their ideas for you to try. Take a look at teacher blogs or Teachers Pay Teachers, where you’ll find entire notebook templates ready for your own classroom. Here are some examples to get you started.
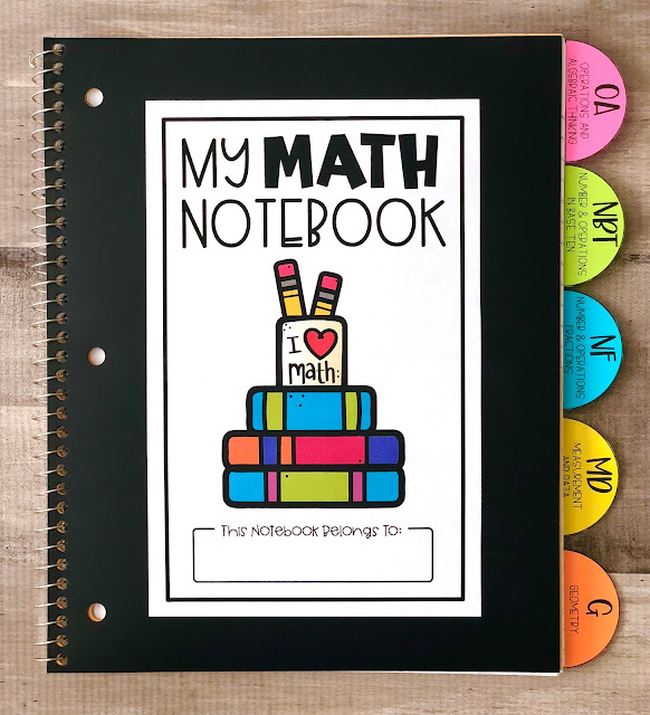
Start with a colorful cover, including a place for students to mark their name. You can create your own, buy a template online, or have kids decorate theirs any way they like.
Not into glue? Printable sticker paper for the win! These free templates are especially cool, since they fit standard label pages and don’t require any cutting either.
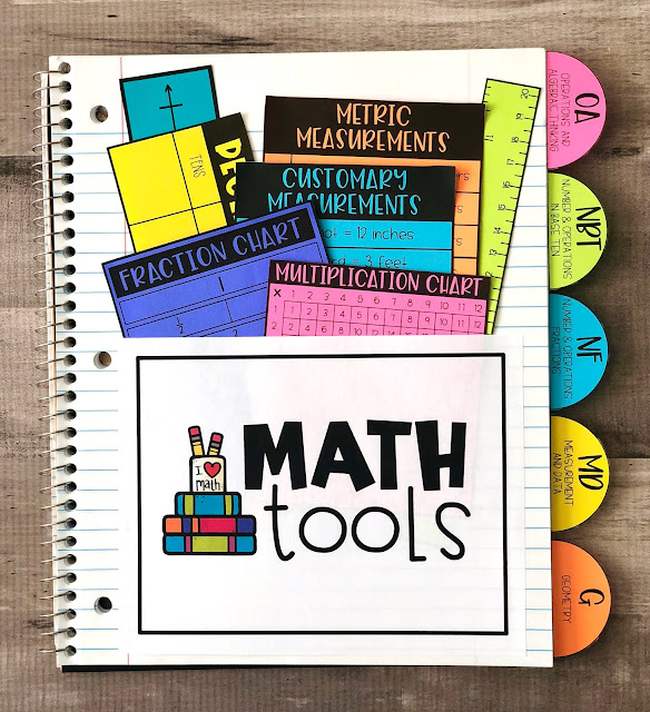
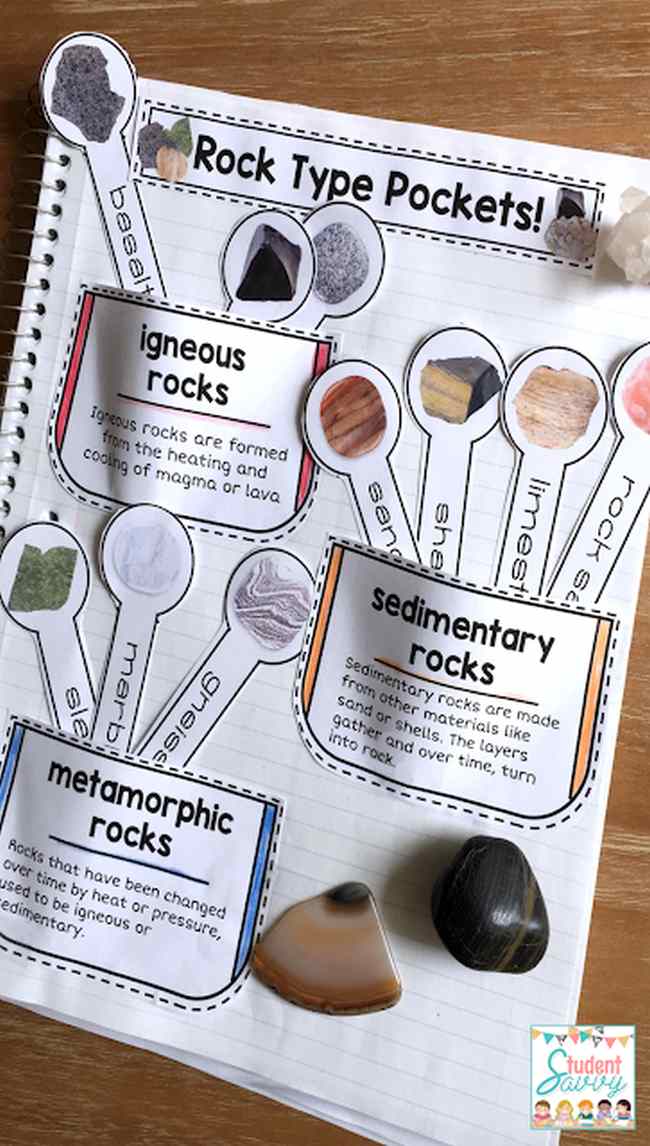
A pocket for reference sheets and other tools is so clever! Add to this page as you provide new tools for students to use in class and at home.
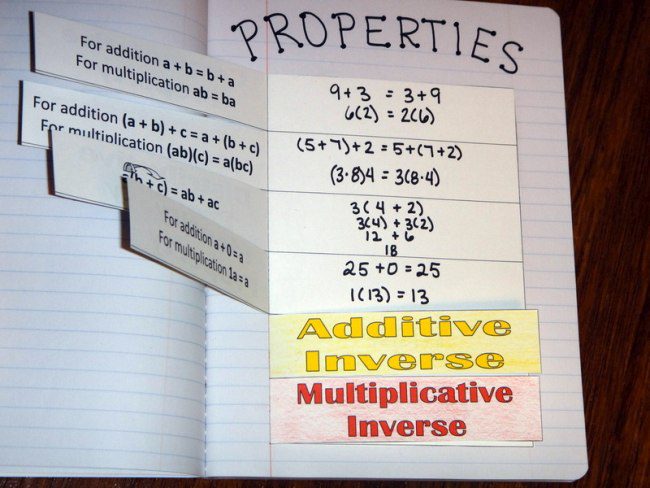
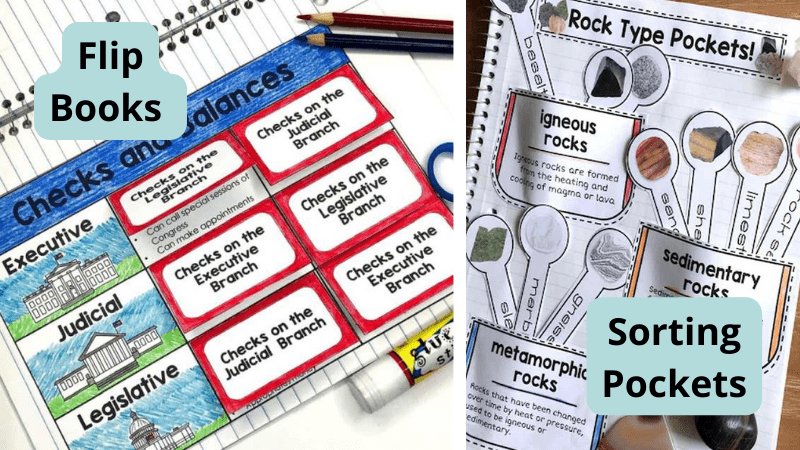
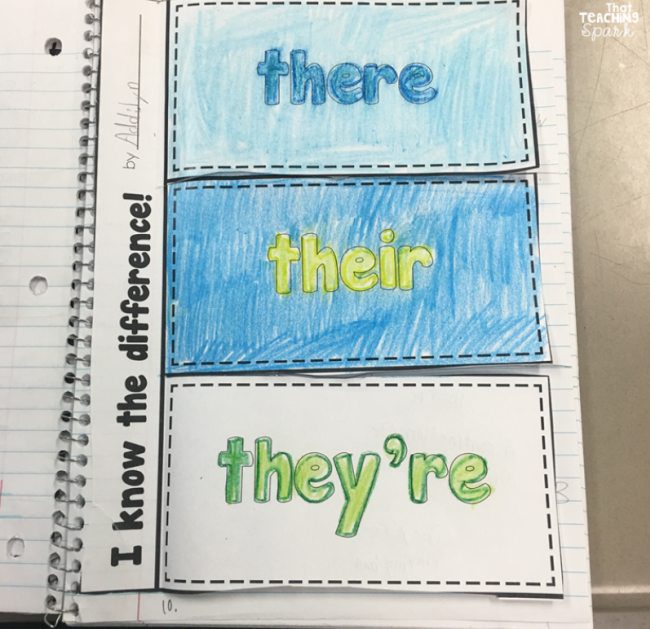
Flip books are really helpful. Students can use them like flash cards to review, or simply use them for reference. We love that this one provides space for examples along with a definition.
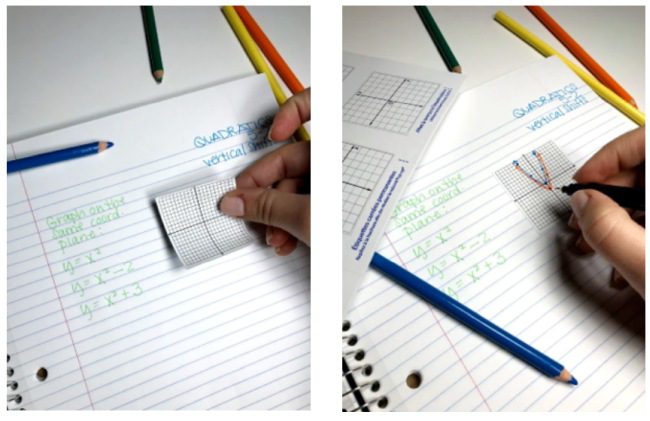
Color is huge when it comes to interactive notebooks. Whether you cut out and paste in an element or have kids draw and color it in, a page like this really helps drive the point home.
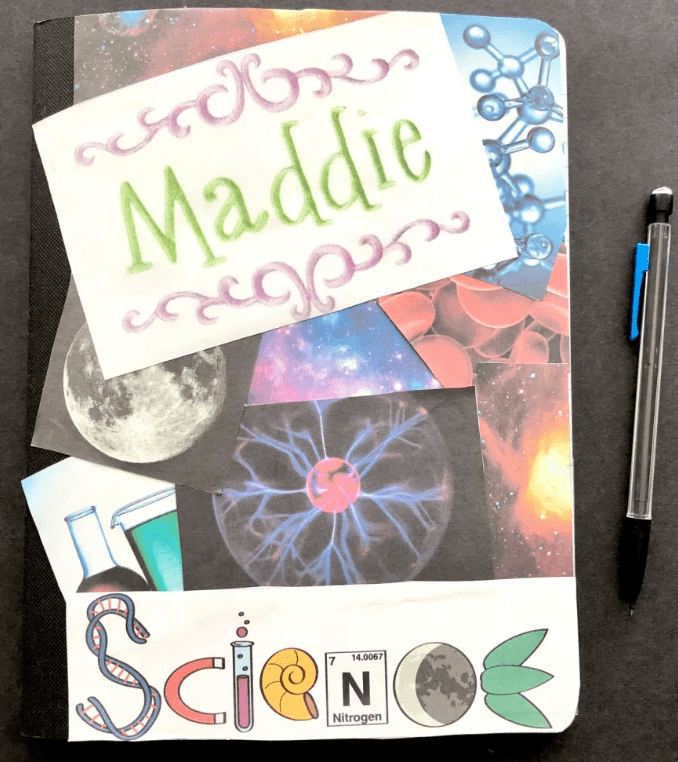
Personalizing notebook covers makes an engaging first-day-of-school project and gives kids a real sense of ownership over their learning.
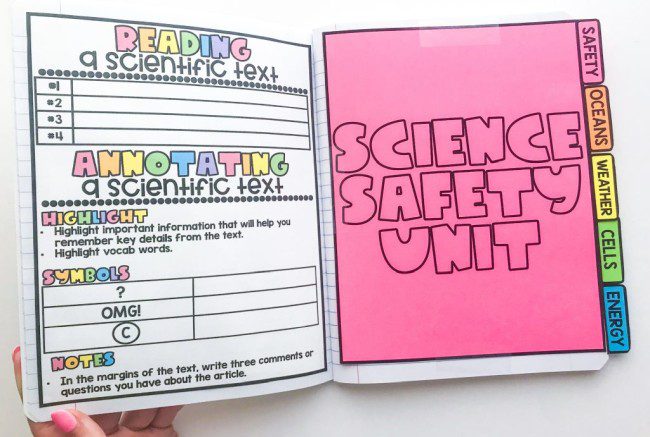
At the beginning of the year, show students how to use their notebooks, including how to read and highlight texts. Have them choose symbols or colors to highlight key info, and encourage them to take notes in the margins.
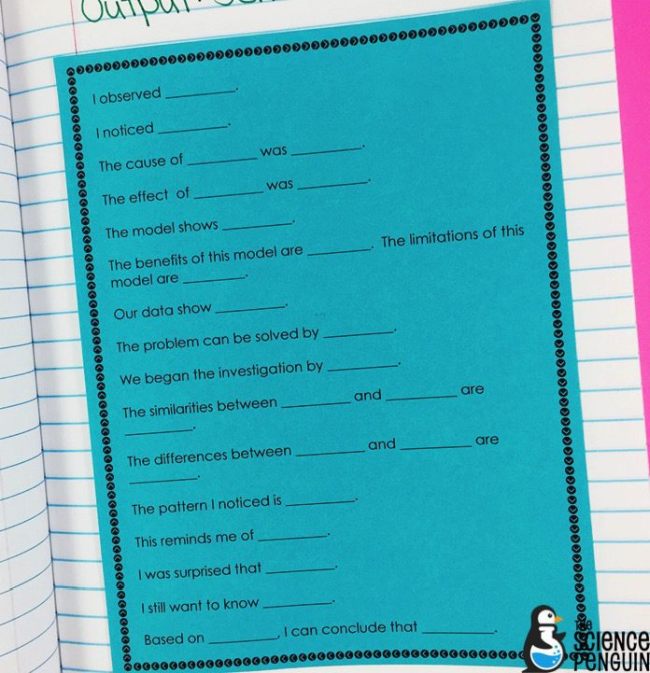
A sentence stem page is perfect for use during class discussions or when students are asked to write a reflection on their learning. This is one page they can refer to again and again, for any activity.
Coloring is a fun activity at any age, so let students get a little creative! They’ll put their own unique spin on their notebooks, while making the learning more meaningful.
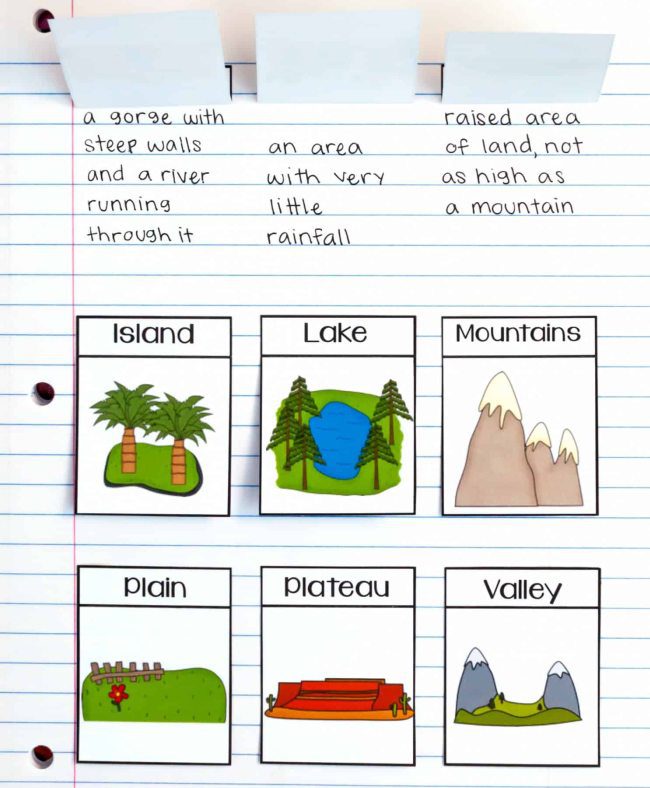
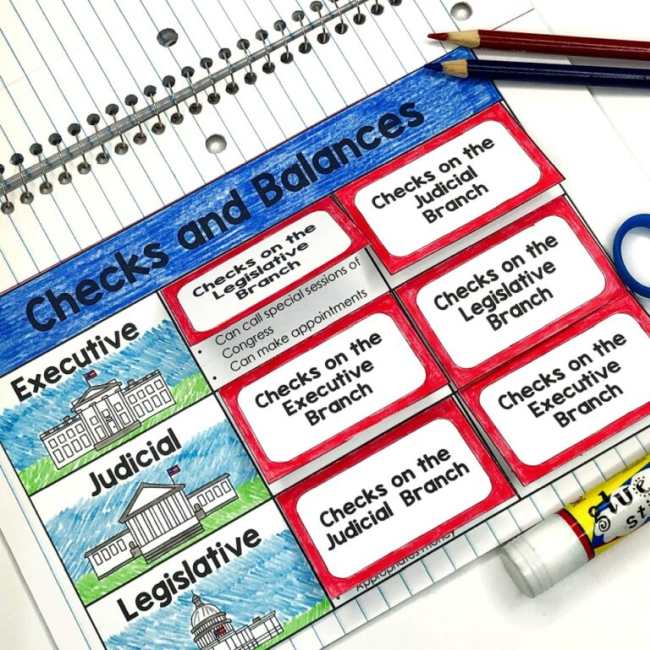
Sorting activities are fun in class and make a terrific review activity at home. When you can, try pairing paper sorts with hands-on real-life examples.
Adding images to vocabulary words is an ideal way to help students commit them to memory. It’s even more interactive if you encourage students to draw their own pictures on the flip cards.
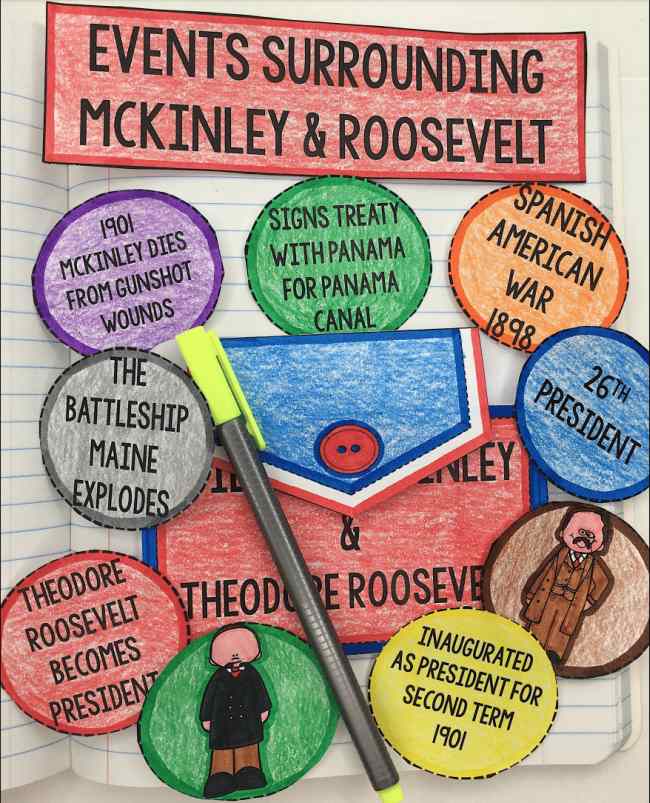
Sorting activities like this are also perfect for timelines. Have students write the correct dates on the back of each, then mix them up and try to lay them out in the correct order.
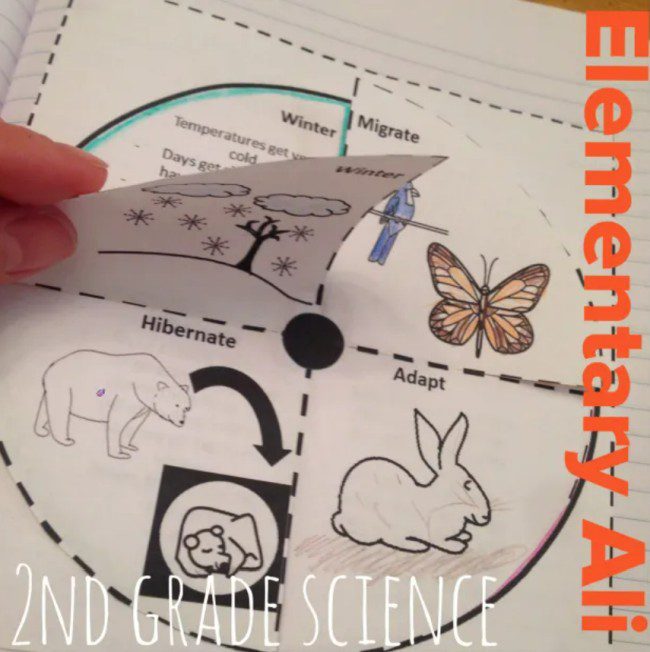
Flip pages are popular replacements for flash cards, making pre-test review easier. This one takes a complex subject and breaks it down into parts that are easy to understand.
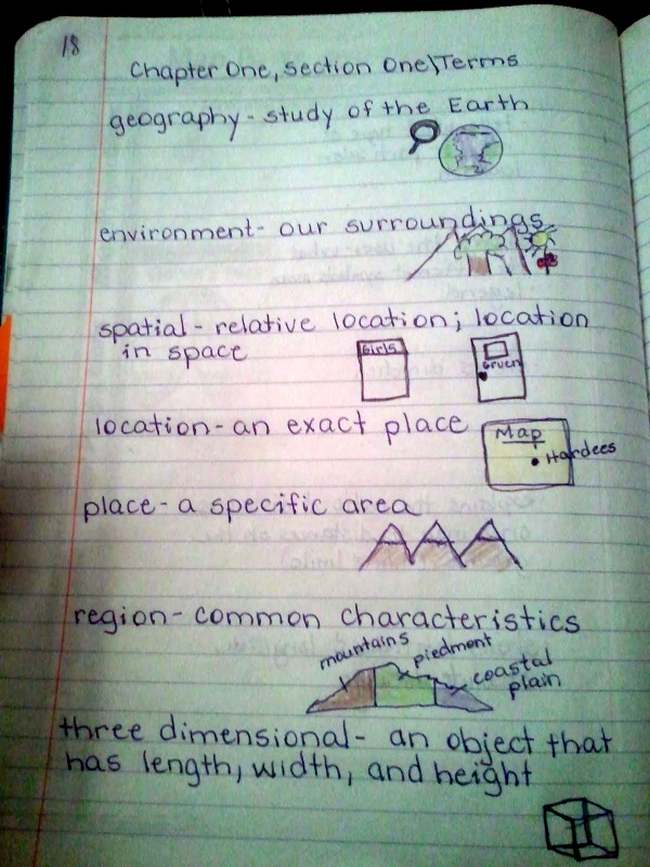
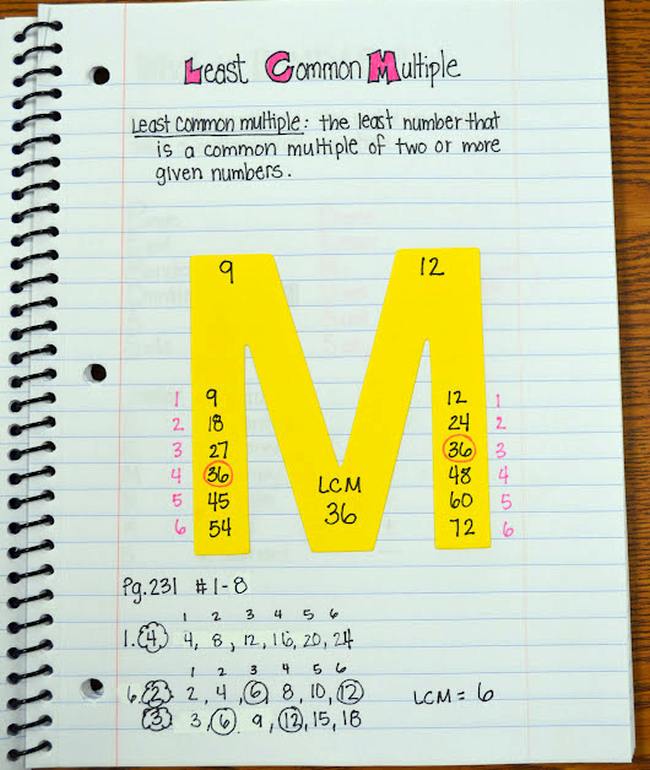
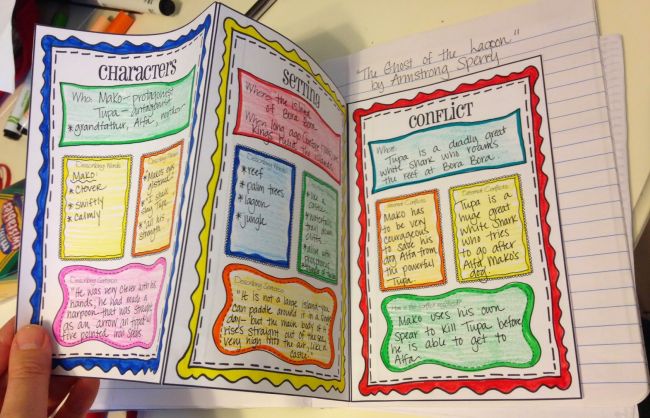
Completely handwritten pages are totally fine in interactive notebooks! In fact, when kids draw their own images, they make a deeper connection to the text.
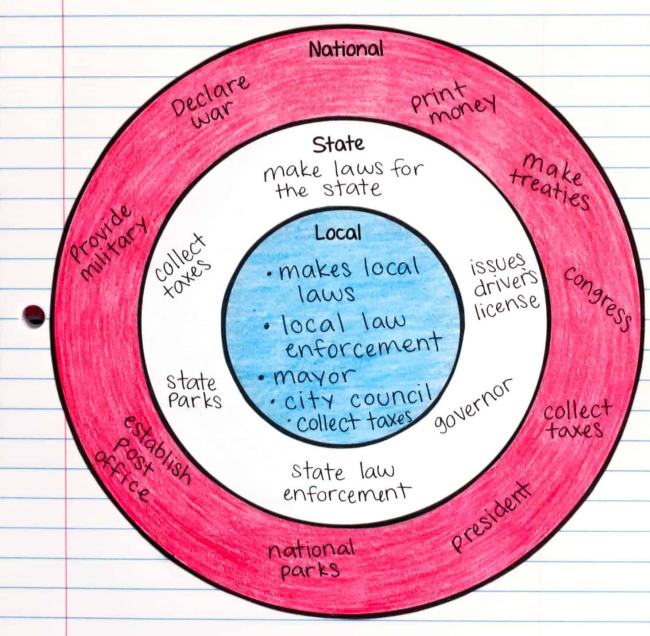
When you’re creating charts, you can either give students a template to fill in or have them draw their own. Either way, it’s important that they be the ones to write in the information.
Folding templates like this help compress a lot of info into one notebook page. Plus, you can use them over and over again for different reading passages.

Adding standards to your notebook sections helps ensure you cover all the required learning. It also shows students why these activities are important.
The more skills students use on each page, the better. This one involves tracing, coloring, cutting, and lots of writing in the examples underneath each flap.
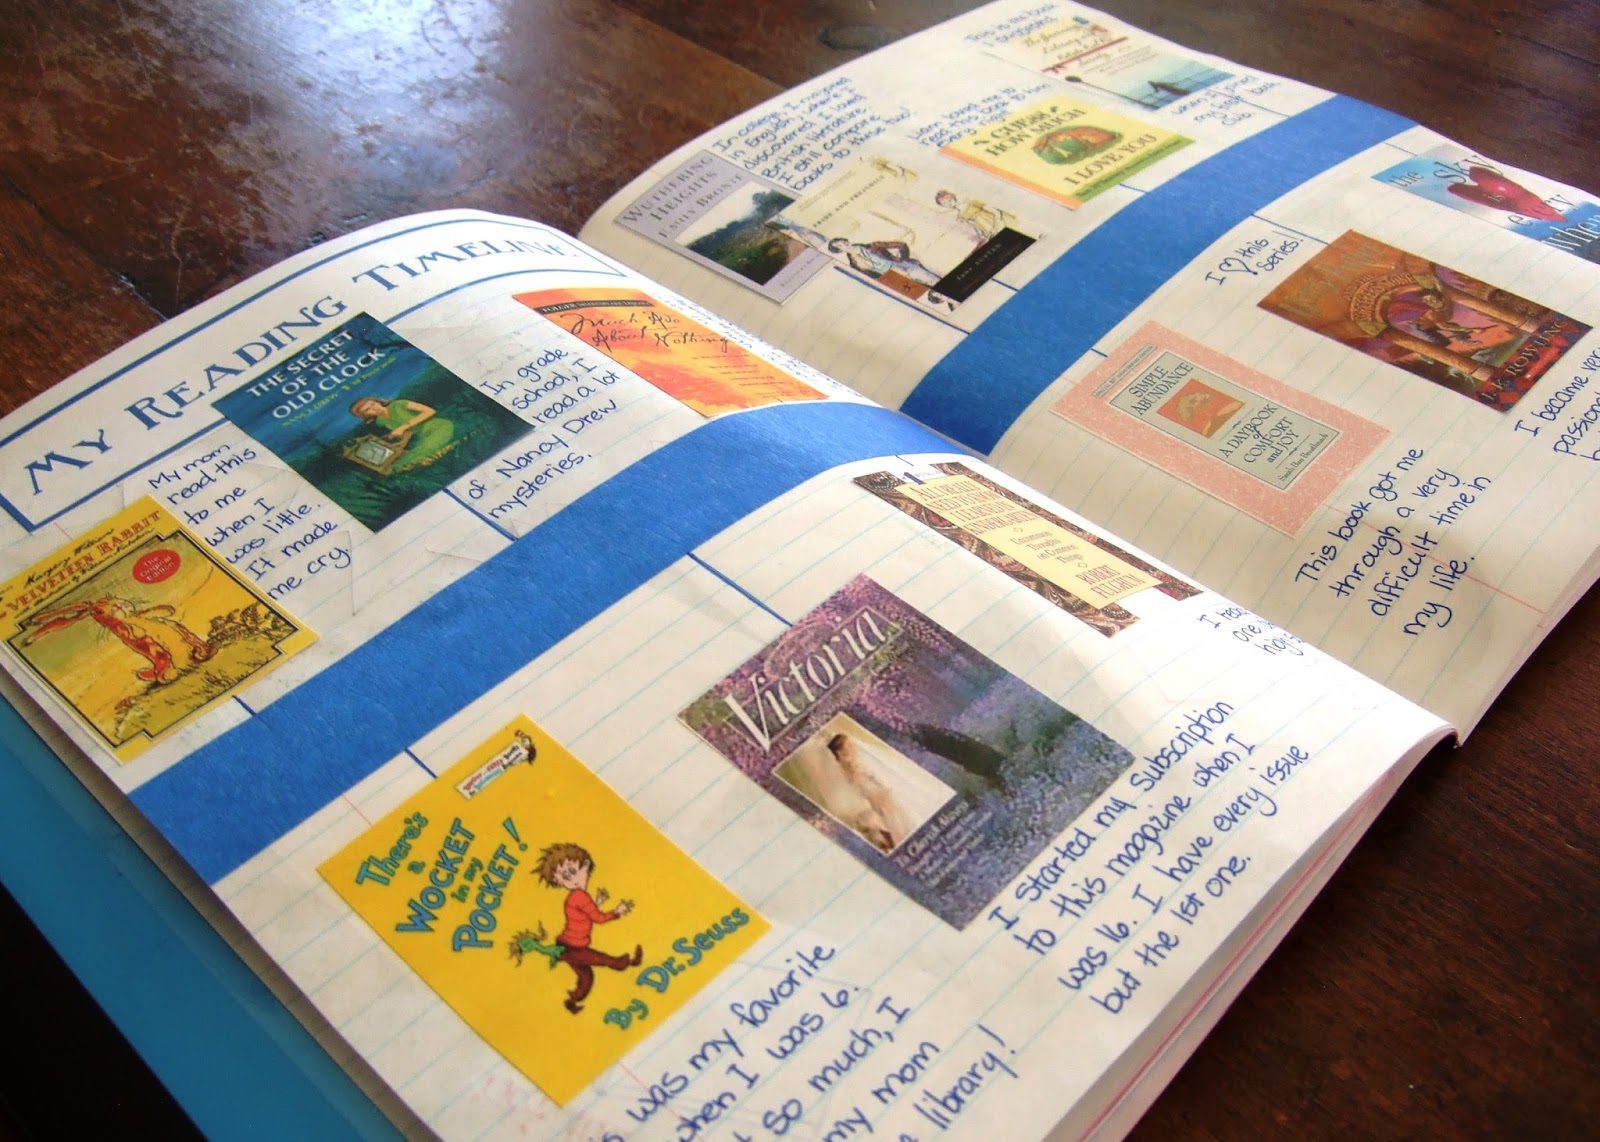
This is such a fun way to keep track of independent reading! Print the cover of the book and paste it in, then add a few notes about each book.
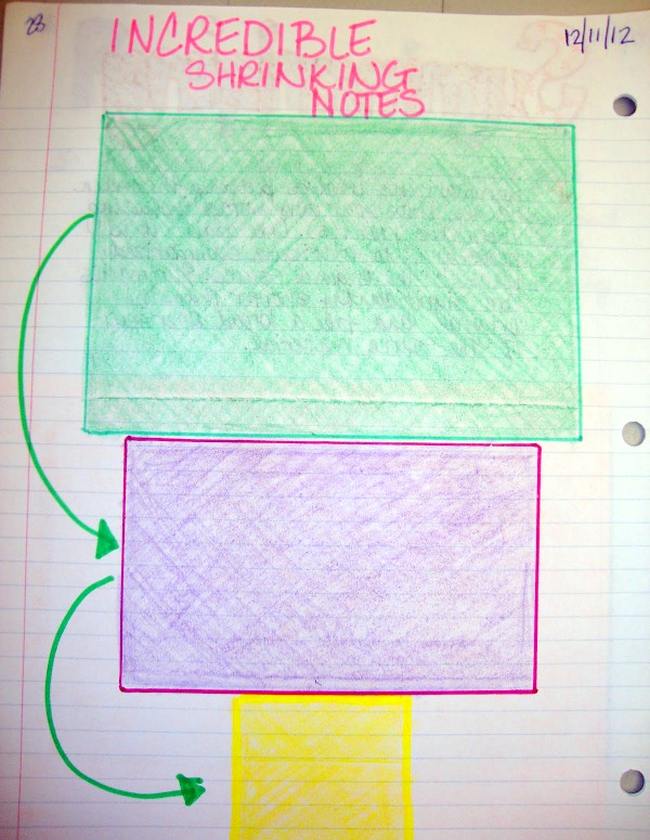
Shrinking notes help students drill down to the main idea of a text. Start with a summary that fills the largest box. Then, distill that down to fit in the smaller box. Finally, write one sentence or even just a few words to fill the smallest box.